Views and Dashboards
In Views and Dashboards, different views can be configured for a Bosch IoT Insights project. Views can consist of external links, iFrame elements, and dashboards.
The main menu item Views is displayed after views have been added. Using Views and Dashboards, collected data can be visualized.
Proceed as follows
Click the Views and Dashboards menu item to configure views and dashboards.
→ The Views and Dashboards menu item is displayed and shows an overview of the views and dashboards.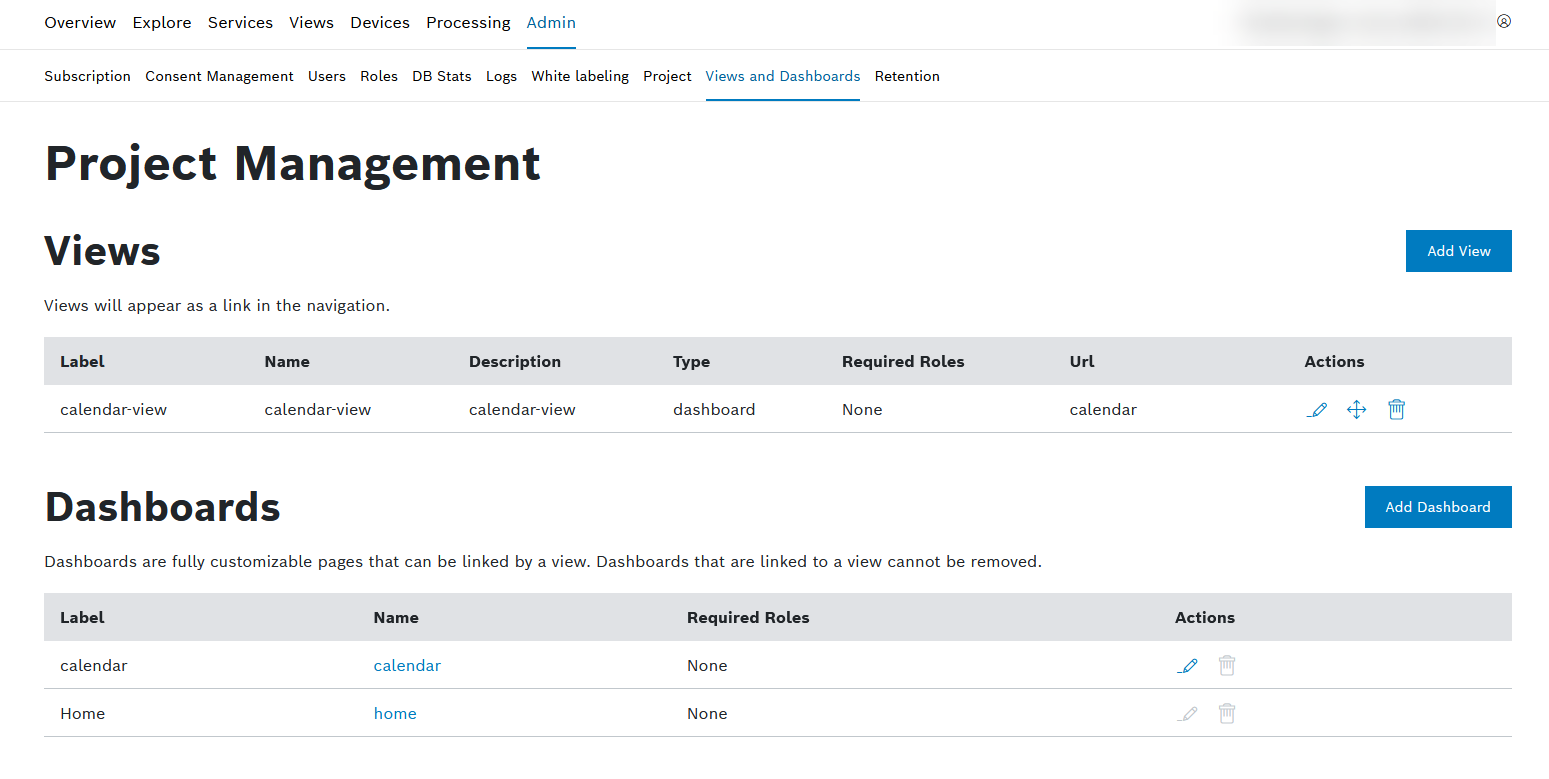
Prerequisites
To execute the following actions, you have to be assigned to the Manager role or higher.
Configuring a view
You can configure different views that will be displayed in the Views main menu item.
Proceed as follows
Click the Add View button.
→ The Update Project's Views dialog is displayed.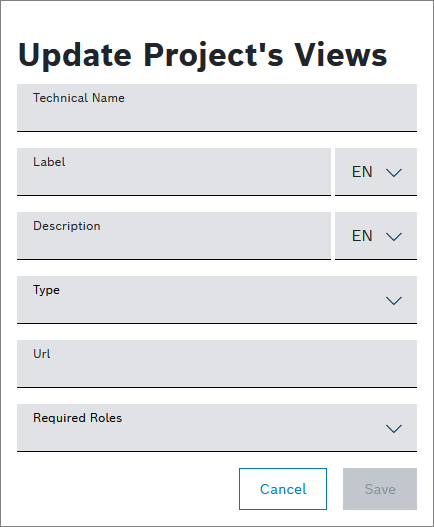
Enter a Technical Name for the view.
Enter a Label.
Click the EN drop-down list and select Add DE: German to add the German equivalent for the view's label.
Enter a Description.
Click the EN drop-down list and select Add DE: German to add the German equivalent for the view's description.
In the Type drop-down list, select what should be displayed with the view.
iFrame element: Structure your view with HTML elements
Dashboard: Link a dashboard you configured under Configuring a dashboard which allows you to add customized widgets
Link: Add external links to your view
Enter a Url to link the type you selected.
If you selected Dashboard in the Type drop-down list, select a dashboard.
In the Required Roles drop-down list, select one or multiple roles who are allowed to configure the view. Not applicable for dashboards.
Click the Save button.
→ The view is added to the view list.
To edit the view's general information, click the Edit button in the line of the view.
To change the order of the configured views as seen in Views, click the Move button and drag and drop the view to the desired location. Refresh the page to see the new order in place.
To remove the view, click the Remove button in the line of the view.
Configuring a dashboard
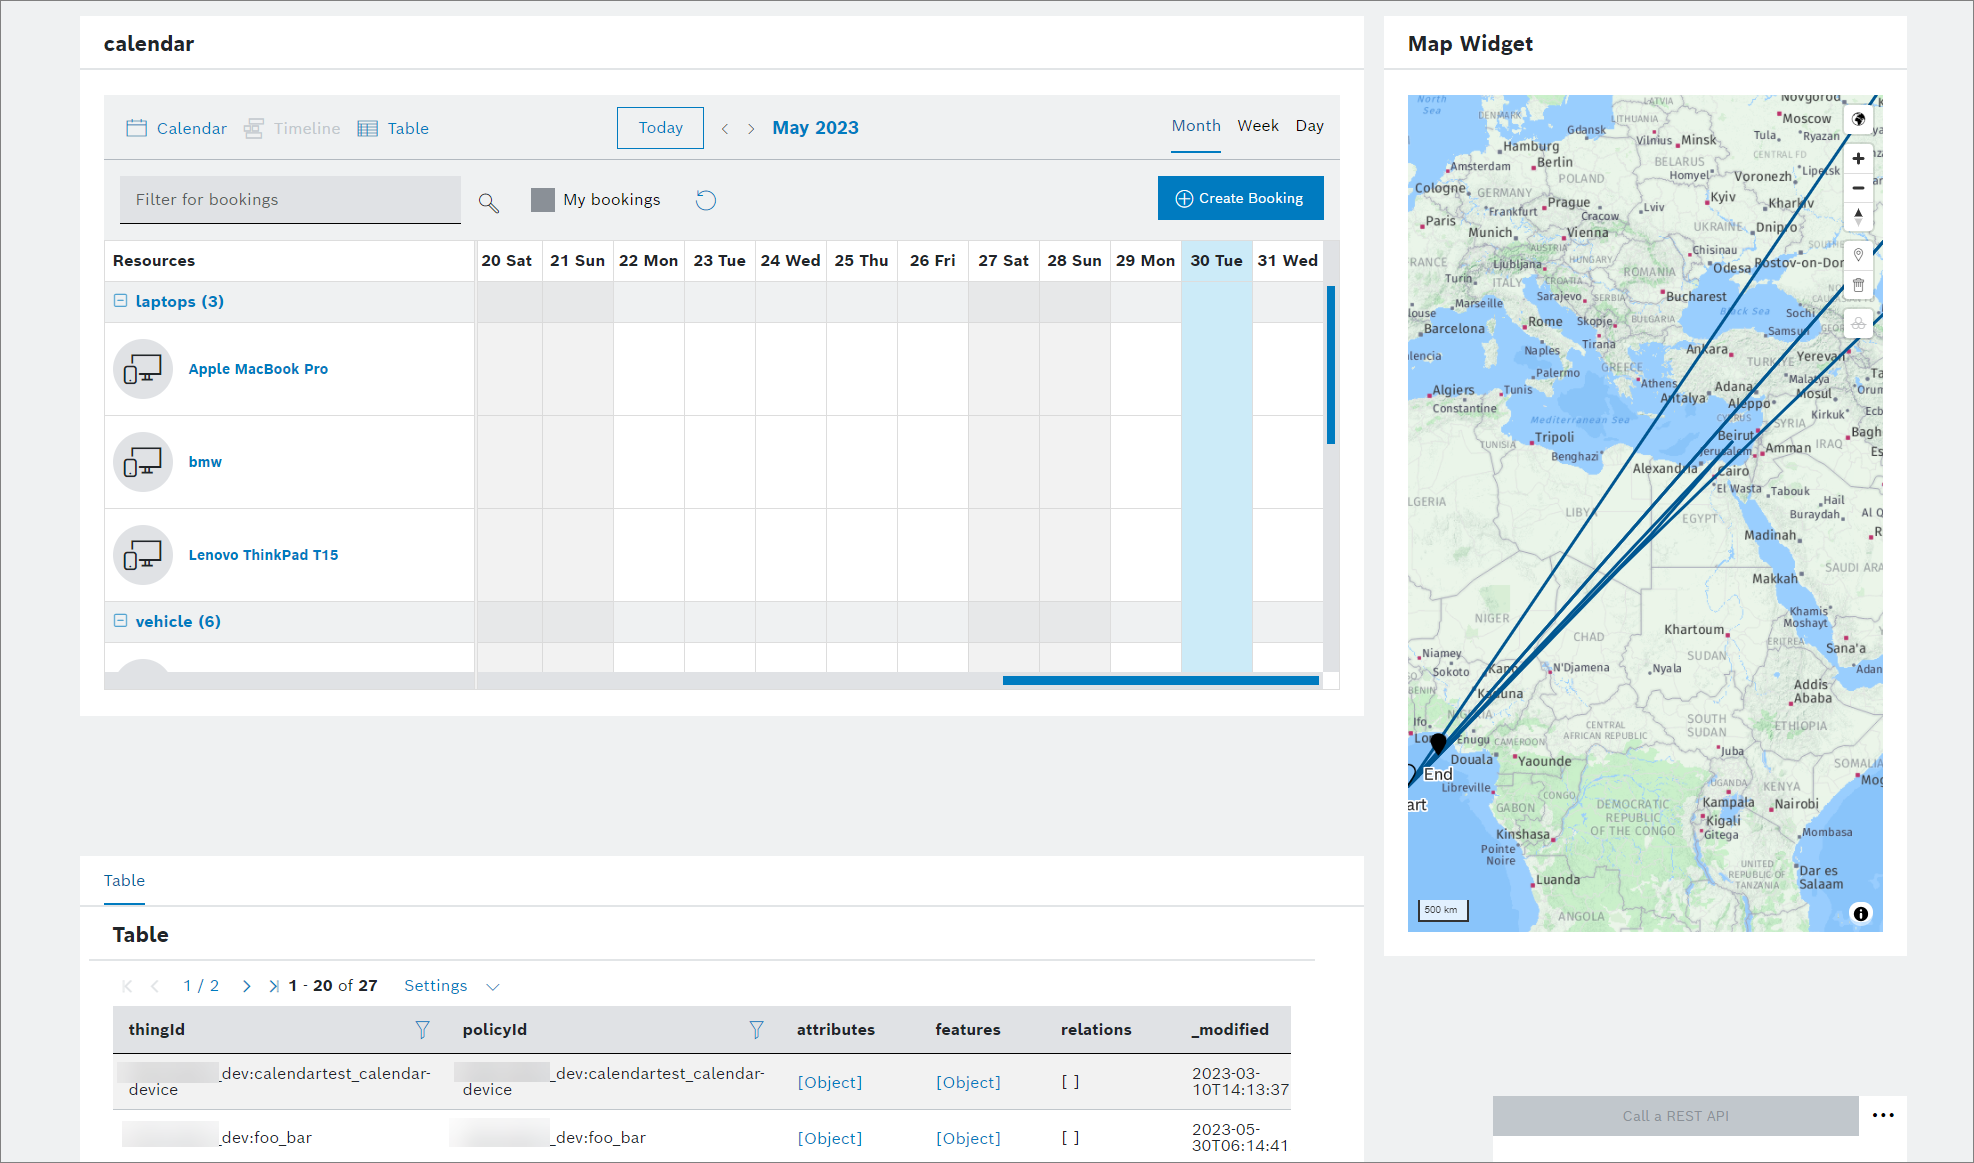
Dashboards are project-specific and consist of widgets. These widgets provide prepared data and can be configured and arranged by power users, managers, and admins, refer to Widgets.
Proceed as follows
Click the Add Dashboard button.
→ The Update Project's Dashboards dialog is displayed.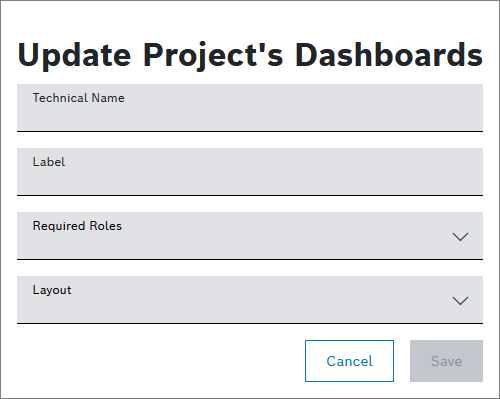
Enter a Technical Name for the dashboard.
Enter a Label.
In the Required Roles drop-down list, select one or multiple roles who are allowed to configure the dashboard.
In the Layout drop-down list, select whether the dashboard should be displayed in a column-based or grid-based view.
If you select Column-based, the size of the widgets can be set on the configuration page.
If you select Free-floating grid, the widgets can be arranged as desired.
If you select Compact grid, there will be no horizontal space between widgets.
You can also convert existing dashboards to the grid-based layout. Dashboards with the grid-based layout cannot be converted back to the column-based layout.
For more information on how to work with the grid-based layout, refer to the Grid-based layout chapter.
Click the Save button.
→ The dashboard is added to the dashboard list.
To edit the dashboard's general information, click the Edit button in the line of the dashboard.
To remove the dashboard, click the Remove button in the line of the dashboard.
To further configure the views and dashboards you have added, continue with Views.