Creating a device
The creation of a device is always tracked in the History.
Prerequisites
You are assigned to the Power User role or higher.
Proceed as follows
In All Devices, click the + Create Device button to add a device to a specific device type.
→ The following dialog is displayed.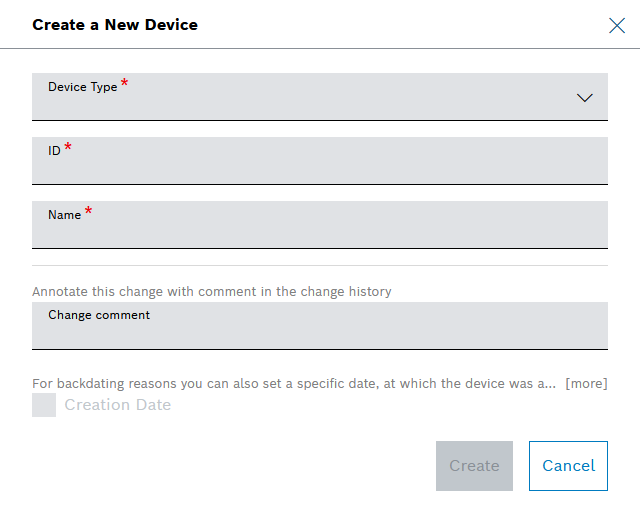
The information necessary for the device creation can be pre-filled, refer to Pre-filling the device information.
In the Device Type drop-down list, select the device type to which you want to add the device.
Enter an ID.
Enter a Name.
If a device property has been set as required in the information block, it has to be entered as well.
Add a Change comment which will be displayed in the change history.
Activate the Creation Date checkbox to backdate to the date the device was actually created.
In the Timestamp field, select the date and time of creation.
In the Labels field, enter a label.
In the Comment field, enter a comment.
Click the Create button.
→ The device is created and displayed for configuring.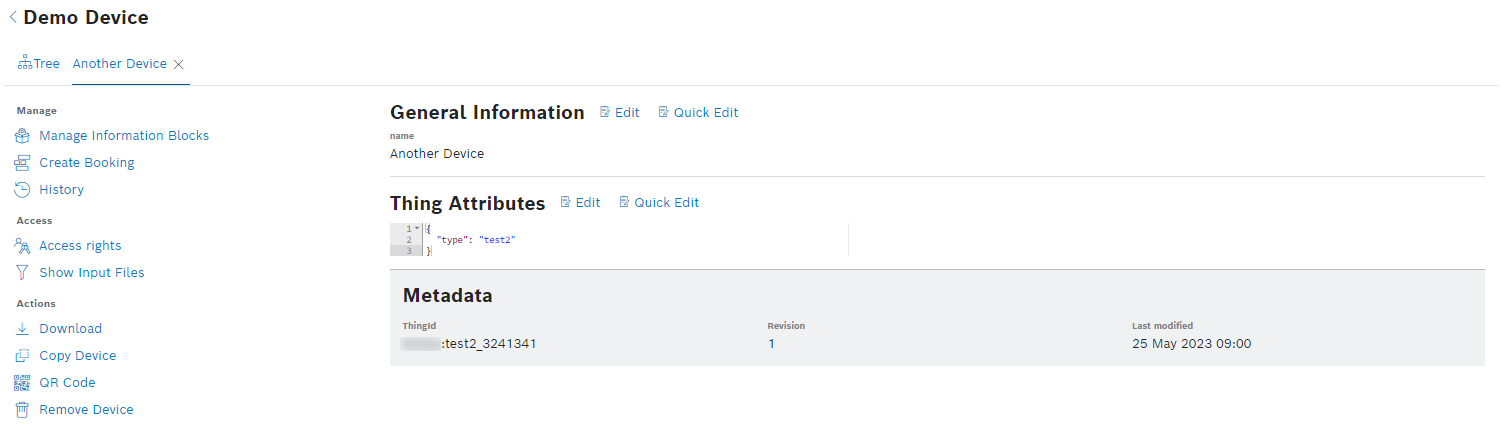
Pre-filling the device information
By adjusting the URL, all visible device fields can be pre-filled for the device creation:
This is possible on the devices overview of a specific device type. The parameters have to be added in the following structure at the end of the URL:
?config={"device":{"name":"Device name","id":"deviceId","<technical name of information block>":{"<propertyName":<propertyValue>}}}
The parameters in the URL need to be encoded. The first part ?config= does not need to be encoded.
Example:
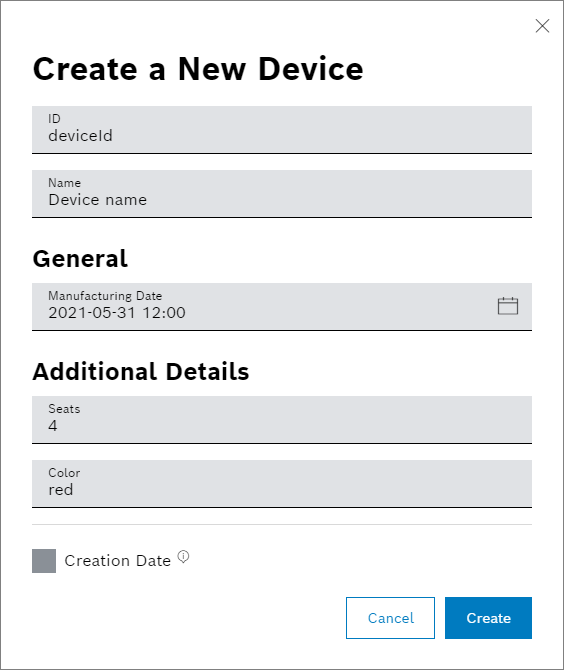
https://bosch-iot-insights.com/ui/project/<projectName>/devices/devicetype/<devicetype>/all?config={"device":{"id":"deviceId","name":"Device name","general":{"Manufacturing Date":"2021-05-31T10:00:00.000Z"},"details":{"Seats":4,"Color":"red"}}}
This part of the URL needs to be URL-encoded: {"device":{"id":"deviceId","name":"Device name","general":{"Manufacturing Date":"2021-05-31T10:00:00.000Z"},"details":{"Seats":4,"Color":"red"}}}
The result looks like this: %7B%22device%22%3A%7B%22id%22%3A%22deviceId%22%2C%22name%22%3A%22Device%20name%22%2C%22general%22%3A%7B%22Manufacturing%20Date%22%3A%222021-05-31T10%3A00%3A00.000Z%22%7D%2C%22details%22%3A%7B%22Seats%22%3A4%2C%22Color%22%3A%22red%22%7D%7D%7D
When opening the extended URL, the dialog is shown automatically and the information of the URL is already inserted: