Prerequisites
You are assigned to the Power User role or higher.
Proceed as follows
- On the left navigation, expand the Services menu and select Conditional Actions.
- Click the Add Conditional Action button.
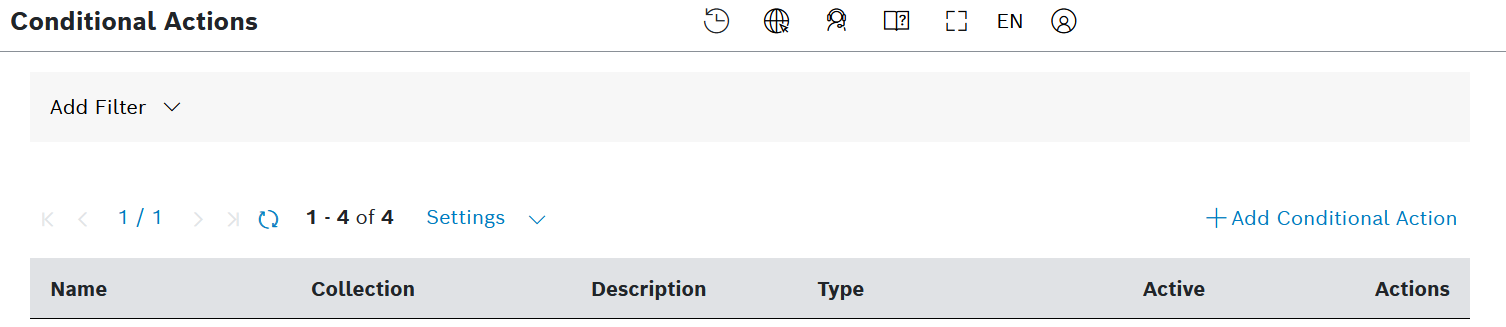
- The configuration page is displayed.
- In the General Information pane, enter a name for the conditional action in the Name field.
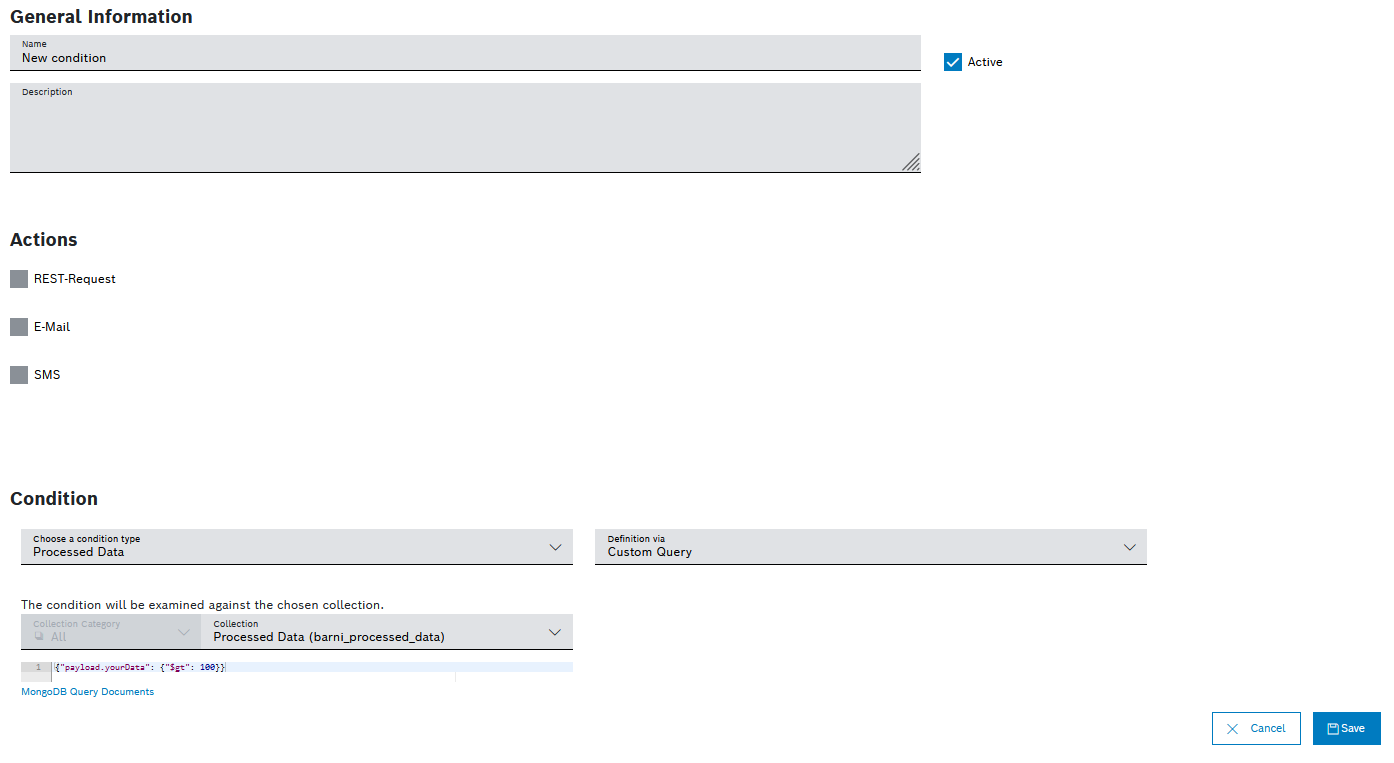
- Use the Active checkbox to specify whether the conditional action is active or inactive.
- In the Description field, enter a description for the conditional action.
- In the Actions pane, activate one or more checkboxes of the actions that shall be executed with the conditional action.
- REST-Request
A REST request action can address all available URIs. Depending on the environment onto which you have booked your service instance of Bosch IoT Insights, there can be whitelabeling, proxy, and firewall restrictions.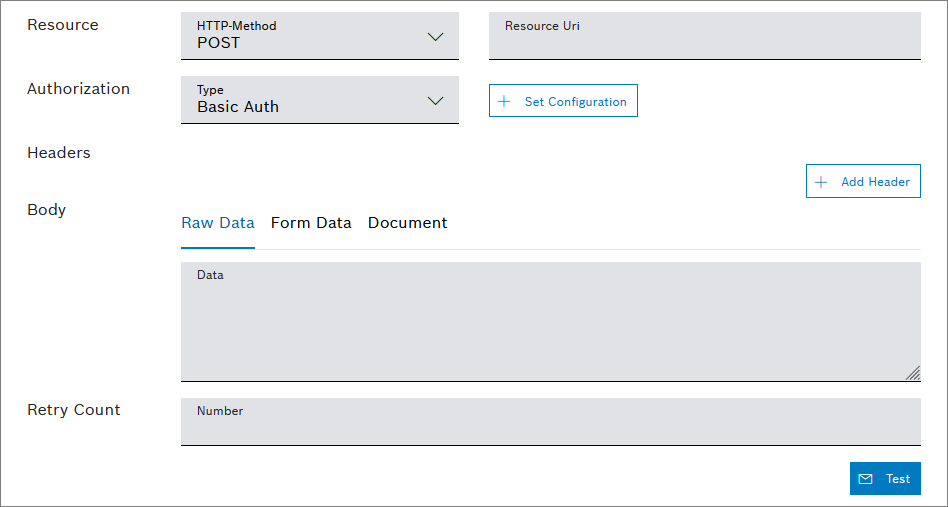
- In the Resource pane, select an HTTP method in the HTTP-Method drop-down list.
- In the Resource Uri field, enter the URI.
- In the Authorization pane, select the type of authorization in the Type drop-down list.
- Click the Set Configuration button to set up the selected authorization.
- For Basic Auth:
- In the Username field, enter the username.
- In the Password field, enter the password.
- For OAuth 2.0
- In the Grant Type drop-down list, select the type of credentials.
- Enter the Access Token URL.
- Enter the Client ID.
- Enter the Client Secret.
- If you selected Password Credentials as Grant Type, also enter the Username and the Password.
- For Basic Auth:
In the Headers pane, click the Add Header button in the Headers pane and enter the header name and a value.
The header information depends your target system needs.
- In the Body pane, define the HTTP body.
- Raw Data: Create a Freemarker template that modifies the processed data document in a defined manner, refer to Freemarker Language Reference.
- Form Data: Follows the HTTP Standard structure which provides key-value pairs.
- Document: Sends the matched document to the HTTP endpoint.
- In the Number field of the Retry Count pane, specify the number of retries the REST request will be repeated until a success HTTP status is responded.
- Click the Test button to test the action.
- E-Mail
If the conditional action is triggered, an e-mail will be sent to notify the listed users.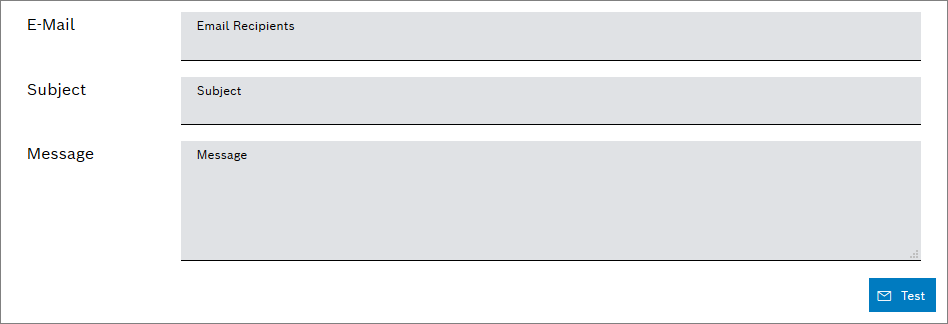
- In the Email Recipient field, enter the e-mail address of the user you want to notify.
To add another recipient, press Enter and enter the email address.
To remove a user from the list, click the x at the end of the email address.
- In the Subject field in the Subject pane, enter text that will be displayed in the subject line.
In the Message field, enter the message to be sent.
You can also provide a placeholder that then shows the value for which the conditional action was triggered. The placeholder expressions are surrounded by
${}. E.g.: ${payload.prop1}.- Click the Test button to test the action.
- SMS
If the conditional action is triggered, an SMS will be sent to notify the listed users (this feature might not be visible based on your region).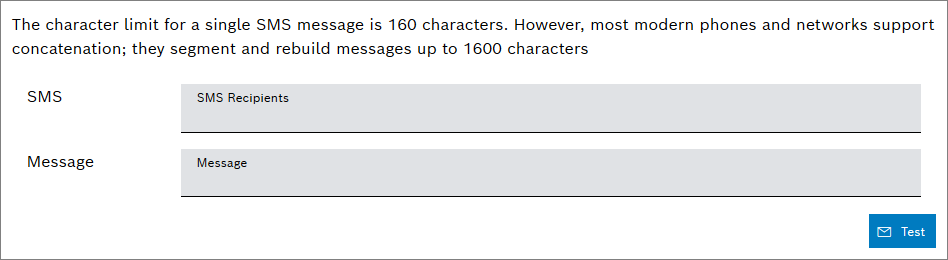
In the SMS Recipient field of the SMS pane, enter the phone number of the user you want to notify.
The format should be as follows: +49 711 564656767
To add another recipient, press Enter and enter the phone number.
To remove a user from the list, click the x at the end of the phone number.
- In the Message field, enter the message to be sent.
- Click the Test button to test the action.
- REST-Request
- In the Condition pane, define the condition of the conditional action.
- In the Choose a condition type drop-down list, select ProcessedData.
- In the Collection drop-down list, select the collection.
In the code block below, enter the condition.
Conditions are defined as MongoDB Find Query.
If you are adding email and SMS as actions, refer to the following hint:
Due to limitations of the FreeMarker templating language, where certain date-like variables in the data model cannot be automatically classified as date, time, or dateTime, FreeMarker needs this information to be provided explicitly by the user.
If a dateTime variable in your data follows the format yyyy-MM-dd'T'HH:mm[:ss[.SSS]]'Z', you need to add ?date, ?time or ?datetime after the placeholder when configuring it in the email or SMS template.
For example, if you have the following document, you need to configure the template placeholders the following way:
{ "deviceId": "vehicle_audi", "lastUpdated: "2022-10-16T17:10:55.000Z",}
The vehicle ${payload.deviceId} was last updated at ${payload.lastUpdated?datetime}.
For more information, refer to https://freemarker.apache.org/docs/ref_builtins_date.html.
Configuring the log retention time of a conditional action
The log retention time cannot be defined individually per conditional action. It is defined on project level and applies to all conditional actions within the project.
If you need to change from the default of 30 days, refer to Retention.