White labeling a Bosch IoT Insights project
In Bosch IoT Insights, you can adjust your project in a way that it complies with the corporate design of your company. To do so, we will make some changes in the Admin > White Labeling section.
Prerequisites
You are a Manager in your Project.
The content of the White Labeling a Bosch IoT Insights project tutorial is also available as a video here.

This chapter details the following topics:
Basic Settings
In Basic Settings, you can define the project's label, contact information, the landing page, and upload a logo. For more information, refer to Basic Settings.
Proceed as follows
In the Label field, enter a name for your project.
Click the EN drop-down list and select Add DE: German to add the German equivalent for the label.
In the Contact Link field, enter a link that will be opened when users click the Contact button at the top.
In the Set project landing page drop-down list, select a main menu item that will then always be displayed after you logged in.
Click the Upload Logo button to change the logo displayed at the top left-hand side.
Click the Upload Logo field and select an image.
The recommended image size is 70px (H) and 100px (W).
→ The image is displayed.
Click the Save button to save the image as logo.
→ The image has been saved as logo.
Click the Save button to save the general project settings.
→ The basic information has been saved.
Email Templates
In Email Templates, you can view the existing e-mail templates that are used to communicate with other project members. The e-mail templates can be adjusted by editing the downloaded file and uploading it back to Bosch IoT Insights. For more information, refer to Email Templates.
Proceed as follows
Open the template you want to adjust.
→ The parameters are displayed.Click the Download button.
Save the file to the desired location.
Edit the file locally by adding and/or removing parameters using your desired editor.
In Admin > White Labeling > Email Templates, click the Upload button to upload the adjusted file.
→ The email template has been updated.
Color Settings
In Styles Settings, you can white-label your project to adjust it to your company's look and feel. For more information, refer to Color Settings.
Proceed as follows
In the Primary Color field, click the hex color code.
→ The color palette is displayed.Either use the slider to pick a color or enter the hex color code.
Activate the Remove colored strips from header and footer checkbox to remove the supergraphics from the header and the footer.
In the Font drop-down list, select the font for the text elements.
Keep in mind that in case the user does not have the selected font installed, the browser will fall back to a font family that is available.
In the Chart palette drop-down list, select the color palette for chart elements.
For the Custom chart palette, enter a comma-separated list of hex color codes, e.g. #899189,#eff7ef,#000, etc.
Click the Save button.
→ The changes to the look and feel of your project have been applied.
Domain
In the domain settings, users can configure a custom domain from which their project is reachable.
Custom domains are exclusively available for paid plans and are subject to billing.
Configuring a custom domain
Follow these steps to configure a custom domain:
Choose between two types of custom domains:
Managed: Full SLA monitoring is set up for the given domain to ensure a high SLA.
Unmanaged: No monitoring is provided for this domain. No SLA is guaranteed.
Enter Domain Name:
Input the domain name without the http prefix (e.g., myowndomain.com).
Please ensure the accuracy of the domain name entered to avoid configuration issues.
Save Changes
Save the changes to initiate the custom domain configuration process.
Once saved, your custom domain request is submitted, and an admin is notified to manually configure your domain.
Please note that this process might take a few days.
You will be notified once your domain is reachable and configured for your project.
Check Domain Status:
The status of your custom domain will be displayed on the domain tab for your reference.
You can now use your custom domain to access your project
Configure custom homepage
Don't forget to configure the custom homepage (next section)
Removing a Custom Domain
If you wish to remove a custom domain from your project, follow these steps:
Press the "Request Deletion" Button:
Locate the "Request Deletion" button in the domain settings section.
Confirm Deletion:
Upon pressing the "Request Deletion" button, you will be prompted to confirm the deletion action.
Confirm your intention to delete the custom domain.
Wait
Your domain is now scheduled for deletion. This might take a few days since manual configuration efforts are needed.
Homepage
In the homepage tab, you can configure the landing page that users will see when they access your custom domain.
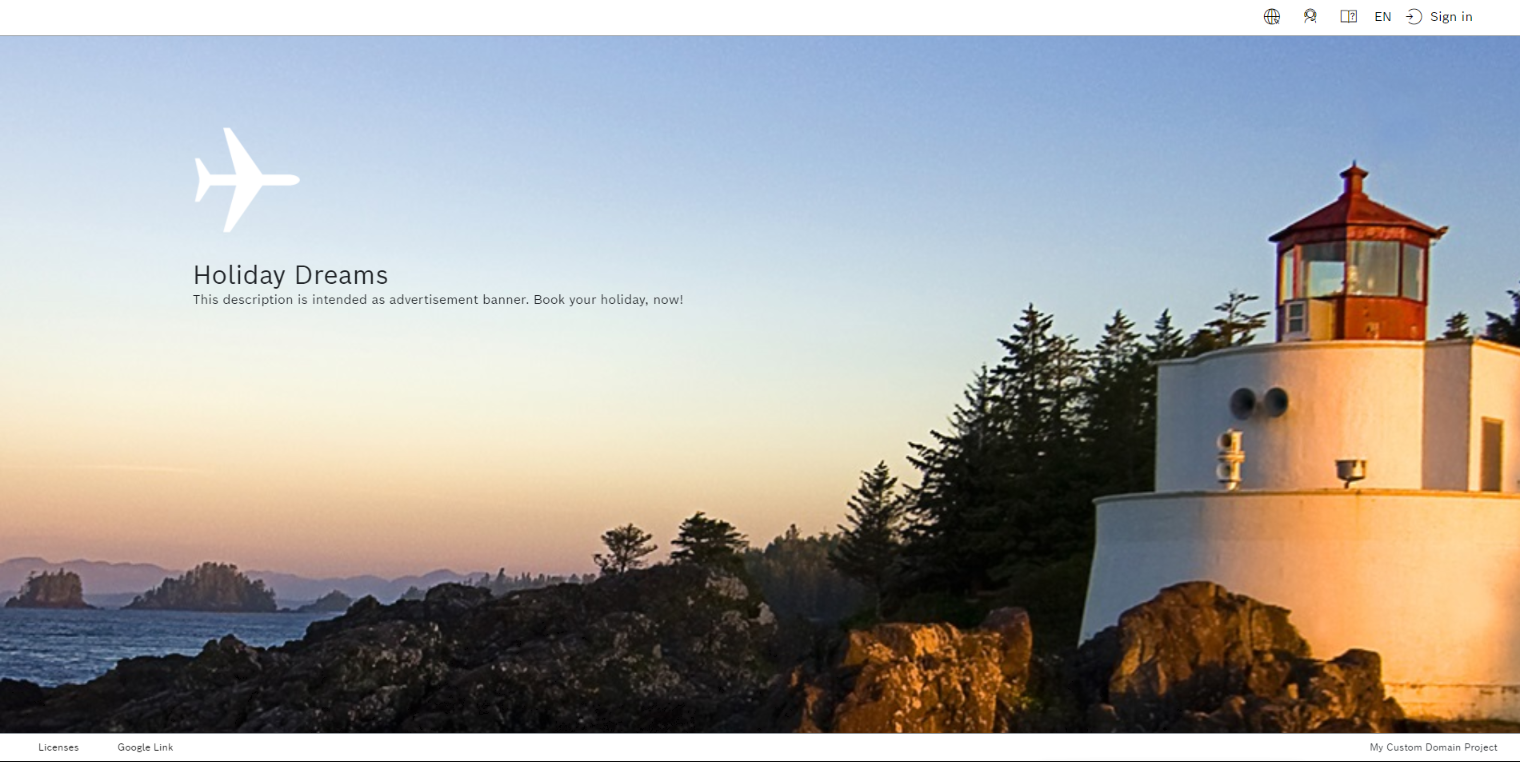
Configuration steps
Set Header Text:
Define a bold title text that serves as the primary headline visible to users.
Set Description Text:
Provide a descriptive text that appears below the header, allowing you to specify what your project is about.
Upload Custom Background Image:
Enhance the visual appeal of your landing page by uploading a custom background image. Click the "Upload" button to proceed.
Please note that the image size limit is 2MB, and JPEG or WEBP format is recommended.
Save Changes:
Press the "Save" button to apply the configured settings to your landing page.
Change logo and footer links
You may also want to customize the project logo and
must set your own footer links, to be compliant to legal law.
For these adjustments, please refer to the corresponding sections within this guide.
Custom Menu
Follow these steps to create a custom menu with only one dashboard visible for all members having the user role in your project:
Navigate to Admin > White Labeling > Custom Menu.
→ The Custom Menu configuration editor opens.Click Collapse all on top of the menu entries.
→ The list of entries now displays only the first-level menu entries.Select each entry one by one and in the detailed view that opens on the right, click Delete icon on the bottom.
→ The respective entry and its sub-entries are deleted from your custom menu.In the configuration editor on the left, click Add Entry
→ The Add Entry configuration dialog opens.In the Entry type field, select Node.
Click the icon on the left of the Label field to change the default icon.
→ This opens an icon set from which you can directly select a new icon or you can use the search bar to find a suitable one more easily.
→ Type in dashboard in the icons search bar and select the icon called desktop-dashboard.In the Label field, enter a name for the entry, which will be displayed on the side navigation, for example Dashboards.
On the right of the Label field, expand the drop down and click Add DE: German.
→ This opens an additional field where you can enter the German equivalent for the label. Type in Dashboards.In the Description field, add a description of the new entry, for example My project dashboards.
In the Restricted for roles field, choose the roles which will be able to access this new menu entry, for example, user.
Expand the Advanced settings field to see the auto-filled in Technical name for your newly created page entry and modify it if needed.
Keep the toggle at Visible to display the entry on the main menu after publishing.
→ The newly created Node entry called Dashboards appears on the list of your custom menu entries in the left column.In the Custom Menu configuration editor on the left, click Add Entry under the Dashboard entry.
→ The Add Entry configuration dialog opens again for the new entry.In the Entry type field of the dialog, select Page.
In the Label field, enter a name, for example Demo Dashboard.
In the Description field, add a relevant description of the new dashboard.
In the Restricted for roles field, choose a role, for example, user.
In the Content type field, choose Dashboard.
In the next field, called Dashboard, expand the drop-down list and select one of the existing dashboards, for example Home.
For how to create a Dashboard, refer to Dashboards.
Keep the toggle at Visible to display the entry on the main menu after publishing.
→ The newly created Page entry called Demo Dashboard appears on the list of your custom menu entries in the left column.Click the Save button under the menu structure.
→ The custom menu configuration is saved.
→ The side navigation displays only one entry called Dashboards, and its sub-entry called Demo Dashboard.
→ All default entries of the side navigation are no longer displayed.
→ The changes are visible for all team members with user role and higher.